Site requirements
- A hard, level unloading surface suitable for a pallet jack
- Sufficient access / unloading area
- Flat storage area with a clean timber pallet (or similar) and clean timber rails or foam pieces / blankets etc. for separation and protection
- Mains electricity - 240V 10AMP
Tools & materials required
- Electric drill with socket 17mm socket driver, hex key bit and #3 Phillips screwdriver bit
- Masonry drill bits, HSS drill bits, 17mm combination spanners x2 for concrete mounting
- Tape measure, hammer, spirit level, string and chalk line
- Jig-saw or similar to cut 6mm plywood
- Optional – angle finder
- Optional - TGD pin-fix tightening tool:

Introduction to custom panels
Preparation
The most important issue with pin fixing or base/core fixing custom panels is ensuring that the substrate or material being fixed to is capable of carrying the canter-levered weight of the glass, e.g. edge beams should be securely bolted to joists or bearers using builders angle brackets.
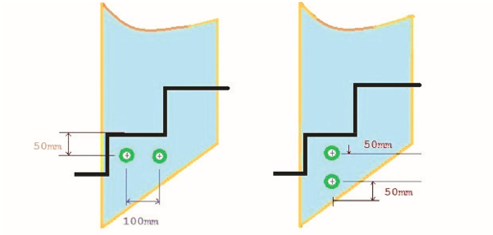
For timber edge beams, TGD recommend F17 structural timber lintel 200mmH x 50mmTHK. This will allow for the hole spacing as shown above, and leave sufficient edge clearance from the beam edge. Prior to drilling, mark out the panel sizes and hole positions (templates can be made of ply sheet to aid in this process to match each panel – see the TGD templating guide for further information).
The Pin Fixing method of mounting can be used for balustrading or pool fencing – contact the friendly TGD staff for the best way to set out your project – including any gates which may be required.
Glass panels
For standard Pin Fix glass panels, refer to the TGD Pin Fix Non-Custom Guide.
Custom panels are any panels which require special manufacturing for your project. Typically, they are panels which are a trapezium shape for stairs or ramps, panels of odd shape or panels with extra holes or stepped cutouts for stairs and steps. Most custom projects can be fitted with standard U-channel handrails or side-mounted slotted handrails. See the TGD handrail guide and U-channel guide for further information.
Measuring and templating
Custom panels are one-off glass panels suited to your project only. Because of this, TGD staff will work with you and help you measure exactly what panels you need, keep the project within regulations and help you template difficult areas. Mocking up in plywood exactly what you need is called ‘templating’.

TGD will supply the chosen fixing to the agreed plan so using 6mm plywood or MDF, create exact templates from and the material by simply screwing it to the stair tread ends or stringer board/wall.
- Fit your Spigots or Pin Fix hardware as per the plan
- Plywood the entire area
- Trim to finished size as one piece
- Mark out each panel, where the treads are, any cut outs including all the panel gaps
- Remove the material, cut to size and fit to the hardware


Fixings
Pin fix fitting kits or base mount spigots will be supplied and depending upon your project, TGD can supply the correct or additional fasteners at the same time. Each pin fix kit or spigot comes with thermal washers to prohibit glass to metal contact which could chip or break the glass.

TIP! Double check the correct fitment of the insulating washers and pressure pads as the washers isolate and protect the panel from sudden temperature changes

Spacers
Some projects may require matching 38mm dia. spacers should a wall or panel run be of an uneven nature and spacing of the main body is required.
When there is a ledge or overhang, the glass panel will need to be moved out to accommodate it. Pin fix body lengths are available in 10mm increments up to 100mm long for this scenario and they will be supplied with a suitable lag screw and grubscrew.

Glass panel detail
Every glass panel Trade Glass Depot supplier is ‘toughened’ or ‘toughened and heat soaked’.
The edges of each glass panel are ‘flat polished with tipped polished corners:

Understanding cut-outs, notches and holes etc.
If your panel requires a cut out, slot notch or holes other than ones which will accompany a handrail order or glass panel with a gate, certain limitation apply as to their positioning.
Here are several of the more common design regulations. Please contact Trade Glass Depot for further information.
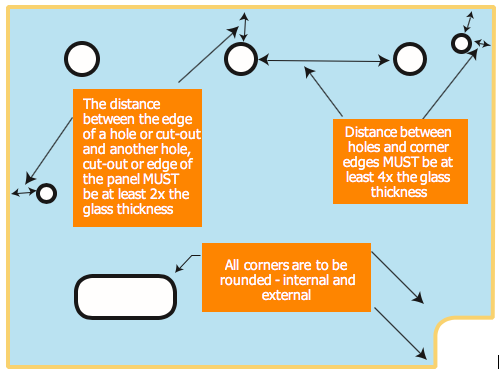
Mounting holes
Mark and cut 20mm diameter holes in your templates for each Pin Fix. TGD’s glass panels, both standard and custom, all conform to AS/NZS 2208 which demands an overall tolerance of only ±2mm. Mount holes can be horizontal pairs, vertical pairs or staggered of the gaps are in excess of 150mm.
When the Custom Glass panels have been manufactured and delivered, fit panels all onto the pin bodies for each straight run (or into the spigots) and check for level, square and alignment using a spirit level and string.
Where there is a case of wall unevenness, spacers may be used to match pairs of Pin Fix bodies vertically and horizontally by checking with a string line, which TGD can supply. When fitting the glass panels onto the Pin Fix bodies, keep the Pin Fix caps at close hand.

CAUTION! These ‘overhanging‘ panels require the Buddy System PLUS a 3rd person to screw on the Pin Fix caps
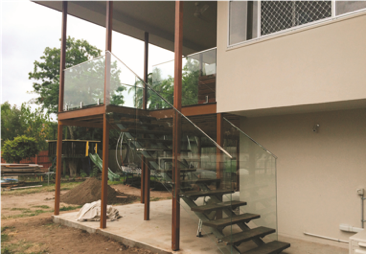
Stairs and steps by regulation require a side mounted handrail and U-channel top rails are also available. Fit the chosen top or side handrail following the appropriate TGD guide, and conduct a final check.
Clean and wash down the panels using your Care and Maintenance Guide.
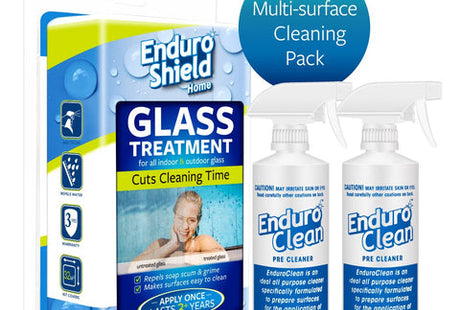
It is highly recommended to purchase factory applied EnduroShield coating when using custom glass panels on your project. Custom glass shapes often have areas which are difficult or impossible to clean properly so EnduroShield will keep those area looking new and clear for many years and comes with a 10-year warranty. Refer to the TGD EnduroShield blogs and articles on our website and/or our Care and Maintenance Guide.
Creating glass templates is important for non-standard glass panels such as custom glass panels. These one-off panels are customized and suited for your specific project and can be easily installed with help from our friendly & helpful TGD team. Using glass templates and guides allows you to fit the specific needs of your project so that you get the right fit, the first time. When glass panels have been manufactured and delivered, they can be fitted and then treated with EnduroShield coating to prolong the appearance of your glass panels and to reduce your glass cleaning time by 90%.
Buy Glass Treatment Kits HereWhat next?
Thinking of getting glass fencing for your pool? We’d love to chat to see how we can help bring your pool to life, get in touch with us here.